Last updated: November 19, 2026
Quick Answer: A small low histamine kitchen on a budget can start with 5 core items: one knife, one cutting board, one saucepan, one sheet pan, and a few storage containers. The topic, How to Set Up a Small Low Histamine Kitchen on a Budget, is really about keeping food cold, moving, and used fast.
A small low histamine kitchen on a budget starts with three things: one clean prep surface, a short list of multipurpose tools, and a storage plan that keeps food cold and used up fast. If the kitchen is tiny, the goal is not a showroom setup; it is a setup that lets you cook, chill, and clean without extra clutter. For many people, a 12-by-18-inch cutting board and a 2- to 3-quart saucepan are enough to get started.
What a low histamine kitchen setup needs first
A low histamine kitchen setup needs a fast workflow, cold storage you can trust, and fewer tools that do more jobs. That is the whole point of keeping it small and cheap. You are not building a specialty kitchen for every recipe; you are making it easier to cook fresh, store leftovers correctly, and avoid the mess that makes food sit out too long. A 2-stage plan is a practical starting point.
Start by clearing one drawer, one shelf in the fridge, and one section of counter. Then buy only the basics that let you prep one meal at a time. That usually means a cutting board, a knife, a sheet pan, a saucepan, and storage containers. Those five items cover most simple meals without crowding a tiny kitchen.
This approach is not for someone who wants every niche gadget. It is also not ideal if you cook for a large family from the same kitchen every day, because a bare-bones setup can become annoying when multiple people need space at once. In that case, the priority is still the same, but the layout needs more discipline.
A useful rule is to think in zones, even if the kitchen is only a few feet wide:
- one prep zone
- one cooking zone
- one cooling and storage zone
- one cleaning zone
That sounds obvious, but it keeps a small kitchen from turning into a pile of tools. It also helps you avoid buying duplicate items, which is how budget kitchens lose their edge. If one saucepan can handle oats, rice, soup, and blanching vegetables, that is better than owning four specialty pots. The USDA FoodKeeper app is a useful reference for storage times and food safety basics: https://www.foodsafety.gov/keep-food-safe/foodkeeper-app
For a broader cooking framework, the hub on low histamine cooking methods and kitchen setup belongs with this page, not instead of it.
How do you set up a low histamine kitchen with limited space?
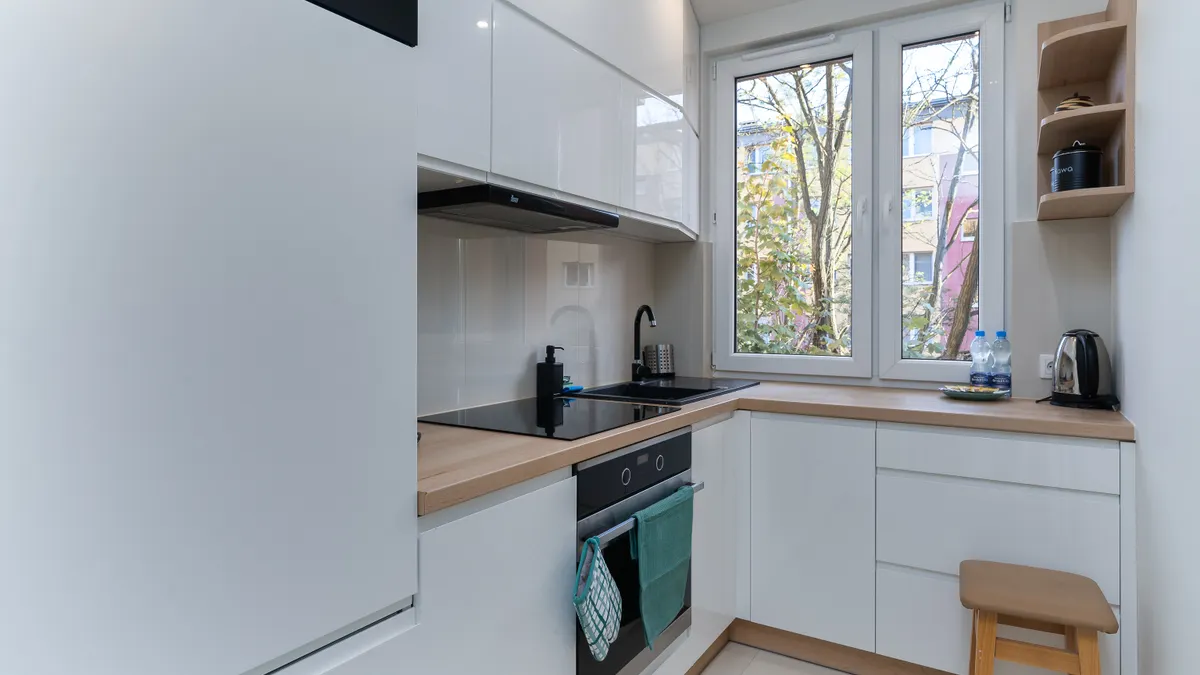
Set up a low histamine kitchen with limited space by clearing one work lane, placing the coldest storage closest to where you cook, and keeping the prep tools within arm’s reach. In a studio apartment or a narrow galley kitchen, the layout matters more than the total number of items. The FDA also recommends keeping the refrigerator at 40°F (4°C) or below: https://www.fda.gov/food/buy-store-serve-safe-food/refrigeration-and-food-safety
Start with the fridge. Reserve one shelf or one bin for the foods you need to use first. Use a simple first-in, first-out system: new groceries go behind older items, and opened containers stay at the front. If your fridge has a crisper drawer, use it for produce you expect to use within a few days. If it does not, a labeled container on one shelf works fine.
Then clear the counter. You need enough space for a cutting board and a sheet pan, even if that means everything else lives in cabinets. A 12-by-18-inch cutting board is a practical size for a small kitchen because it gives enough room for chopping without swallowing the counter. If your counter is even smaller, pick a board that fits flat in the sink or on a tray-style rack for drying.
The storage containers matter just as much as the cooking tools. Use a small stack of containers in one size if possible, instead of a random mix that does not nest well. Square or rectangular containers usually waste less fridge space than round ones. Clear containers help you see leftovers before they get forgotten, and that matters more than buying a fancy lid system.
If wall space is available, use it for dry goods or frequently used items, not for decorative racks. A single hook rail can hold a pan, a whisk, or a heat-safe spoon. That is enough. The goal is not to fill every vertical inch; it is to keep surfaces open so food prep stays quick and easy. If you are unsure about a wall-mounted strip or drawer insert, check installation guidance from the manufacturer and consult a professional if mounting is uncertain.
The cheapest starter setup that still works
The cheapest starter setup that still works is one knife, one cutting board, one sheet pan, one saucepan, and a small set of storage containers. That covers the basic motions of low histamine cooking: wash, chop, cook, cool, store. For budget planning, this core can often be assembled in the low tens to low hundreds of dollars, depending on whether you buy new or secondhand.
Here is the order that makes the most sense when money is tight:
-
Buy the knife first. A single solid chef’s knife, often in the 8-inch range, does most jobs in a small kitchen. It chops vegetables, trims meat, and breaks down fruit without needing a second blade. A sharp, mid-priced knife is more useful than a drawer full of dull ones. Consumer Reports and similar testing groups consistently rate sharpness and handle comfort as the biggest practical factors in knife use.
-
Add a cutting board. A stable board keeps prep safer and faster. If you only buy one, choose a size that gives you enough room to keep raw ingredients and finished food separated on the same surface. For small kitchens, a board that is easy to wash and dry matters more than a decorative material.
-
Choose one saucepan. A 2- to 3-quart saucepan handles grains, sauces, steaming, and reheating small portions. It also lets you cook foods in batches without turning the stove into a traffic jam.
-
Get one sheet pan. A half-sheet pan is a strong budget pick because it roasts vegetables, catches drips, and gives you a flat place to cool cooked food before it goes into containers.
-
Buy storage containers last. Start with enough to hold one or two days of leftovers. Airtight containers with tight-fitting lids are more useful than novelty jars because they stack and travel well. If budget is tight, choose a few that are truly useful instead of a large mixed set. NSF notes that food-contact containers should be easy to clean and in good repair.
That order saves money because each purchase should solve more than one problem. A cheap gadget that only does one task usually loses to a plain tool that does three. The main exception is freezer-safe storage if you plan to freeze portions right away; that belongs higher on the list if your cooking rhythm depends on it.
What to skip at the start: garlic presses, avocado slicers, oversized utensil sets, multiple mixing bowls, and duplicate pans in different sizes. Those items eat cabinet space and do not improve a low histamine workflow nearly as much as a single sharp knife and a clean storage system.
A budget layout that keeps food moving fast
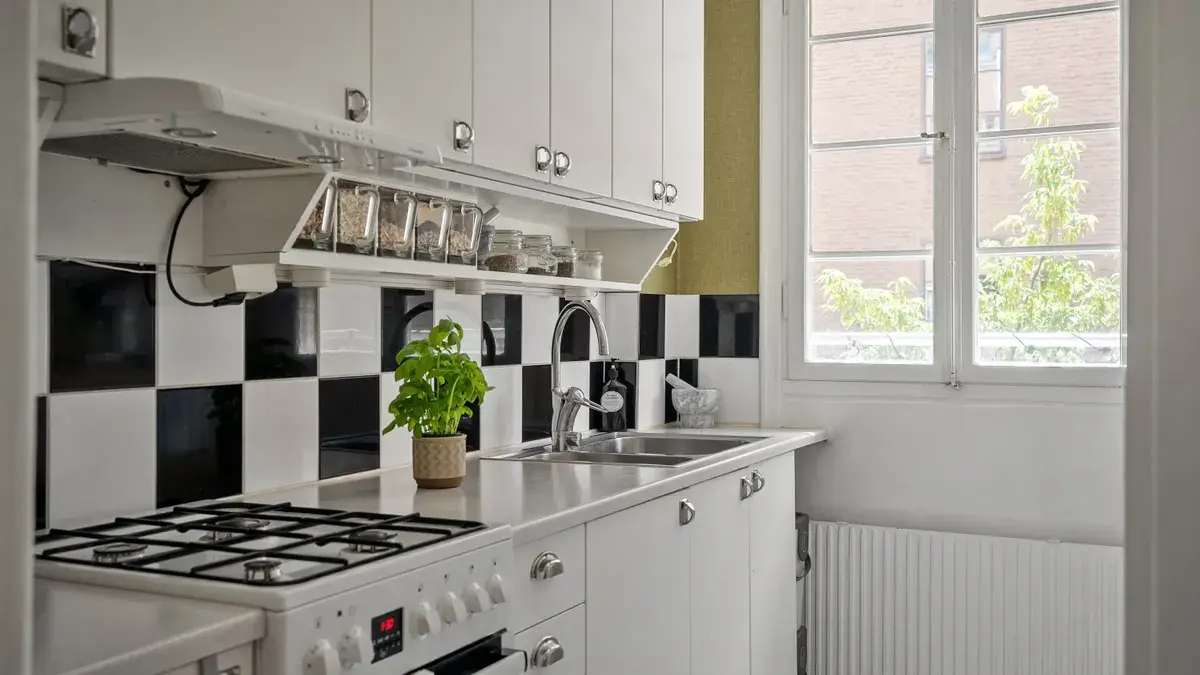
A budget layout that keeps food moving fast puts prep tools in the same 2-foot area and keeps storage containers near the fridge, not buried in a far cabinet. The shortest path usually wins in a tiny kitchen, because you are less likely to leave food out while hunting for lids or bowls.
A practical layout looks like this:
- Counter: cutting board, knife, one spoon rest or small tray
- Cabinet or drawer near stove: saucepan, sheet pan, spatula, ladle
- Fridge shelf: current-day ingredients, leftovers, prepped produce
- Cabinet near fridge: storage containers and lids together
- Trash or compost access: one step away from prep, not across the room
Keep lids with containers if possible. Separate lid storage looks tidy for about a week and then turns into a search problem. If the lids are nested inside the container, you save time every single day. That is a reliable way to keep a budget kitchen usable.
The fridge deserves special attention because low histamine cooking depends on speed after food is made. Put shallow containers in front, not deep stacks that trap a forgotten meal in the back. A shallow container cools faster and makes leftovers easier to portion. If you cook rice, soup, or roasted vegetables, spreading them into a thin layer before chilling can help them cool faster than leaving them in a deep pot.
A tiny drying rack can help too, but only if it folds flat or sits over the sink. Do not buy a large counter rack that permanently steals prep space. The same goes for spice racks and knife blocks. In a very small kitchen, both can become clutter traps. A narrow drawer insert or a magnetic strip can work better, but only if the wall space is available, the mount is secure, and a professional or manufacturer guide supports the setup.
One honest trade-off: minimal storage means more deliberate shopping. If you buy too much at once, the system fails. A low histamine kitchen on a budget works best when the fridge is treated like a daily-use tool, not a warehouse. The USDA also advises keeping leftovers in the refrigerator within 2 hours.
The prep workflow that makes the setup worth it
The prep workflow that makes this setup worth it is simple: shop small, prep fast, cool food quickly, and clean before the next cooking round. Without that workflow, even a good layout can turn into an expensive pile of utensils.
Use this sequence:
- Unpack groceries immediately. Put perishables into the fridge within minutes, not after the rest of the bags are sorted. The result should be a cold storage shelf ready for same-day use.
- Wash and trim only what you can use soon. In a low histamine kitchen, you are better off prepping one or two meals than washing every item in the bag. That keeps produce from getting forgotten.
- Cook on one sheet pan or in one saucepan at a time. A single vessel keeps cleanup under 15 minutes and lowers the chance of cluttered counters.
- Portion leftovers into shallow storage containers. Small portions cool faster and are easier to grab the next day. A single container for a whole batch is cheaper, but it is not as practical for a small kitchen.
- Label the contents and date if your routine is not daily. Even a simple marker line on painter’s tape can prevent guesswork later. The result is fewer mystery containers and less waste.
- Wash tools right away or load them into one designated drying spot. The kitchen stays open for the next meal instead of becoming a second sink.
This workflow has a real budget effect. Food waste is expensive, and small kitchens are more likely to waste food when containers are too large, prep space is too crowded, or the fridge is not organized. That is why the setup is not just about tools; it is about reducing the number of steps between cooking and storage. In practical terms, fewer steps usually means fewer spoiled ingredients.
A common mistake is buying a big matching set of everything at once. It looks efficient, but it usually leaves you with the wrong mix of sizes. A better move is to buy one good item, then add the next only when the first one proves useful in your actual routine. The same rule applies to small utensils: one spoon, one spatula, one knife, then expand only if the workflow asks for it.
What to buy later, after the basics work
What to buy later is anything that improves speed only after the basic system is already in place. That includes extra sheet pans, a second saucepan, mixing bowls, and specialty storage pieces. Buy those only when you can name the problem they solve.
If you cook the same type of meal several times a week, a second sheet pan may be worth it. If you make sauces, soups, or grains in batches, a second saucepan can keep dinner moving while one pot is already in use. If your kitchen is so small that dishwashing piles up, a compact dish rack or sink caddy may help more than another utensil.
This is also the point where a second cutting board can make sense. Keep one for raw ingredients and one for ready-to-eat food if cross-contact is a concern in your household. A second board is not a luxury if the first one forces you to pause and wash it every time you switch tasks. It is, however, unnecessary if you cook one ingredient at a time and clean between steps.
Do not buy around your habits with the hope that the right tool will fix them. A slow workflow is usually a storage problem, not a gear problem. If containers keep disappearing, the issue is probably where they live, not whether they are glass or plastic. If the counter stays crowded, the answer is almost always fewer things on the counter, not a larger caddy.
A good budget setup matures in layers. The first layer makes cooking possible. The second layer makes it comfortable. The third layer is where preferences start to matter. Until then, keep the focus on items that reduce waste, reduce clutter, and make cold storage easier to use.
Common mistakes that waste money in a tiny low histamine kitchen
Common mistakes that waste money in a tiny low histamine kitchen include buying too many specialty tools, using oversized containers, and spreading storage across the whole room. Each one costs space first and money second.
The biggest mistake is treating the kitchen like a general-purpose gadget zone. A garlic press, microplane, mandoline, and extra mixing bowls may all be useful in the right kitchen, but they are not first-line purchases here. The cost is cabinet clutter and slower cleanup. The fix is to start with a knife, board, saucepan, sheet pan, and a few containers.
Another mistake is choosing containers that are too large for the meals you actually make. A half-full container takes up the same fridge space as a full one, and it cools less efficiently. Smaller containers or shallow shapes are usually more useful in a tight fridge. The same rule applies to pots: one medium saucepan beats two giant ones when space is limited.
A third mistake is keeping prep tools far from the prep area. If the knife lives in one drawer and the board in another room, the setup adds friction every time you cook. That friction turns into takeout, wasted produce, or sloppy prep. The better choice is simple storage close to the stove and sink.
The last mistake is assuming the kitchen needs to look finished before it works. It does not. A low histamine kitchen on a budget can look plain, even rough, as long as it is clean, organized, and easy to reset after cooking. That is the real standard.
Key takeaways
- Start with a small group of tools that handles daily cooking, not a full catalog of kitchen gear.
- Keep the fridge and prep counter organized around speed, because food storage and cleanup matter as much as cooking.
- Buy storage containers and extra tools only after the basic workflow is working.
- In a tiny kitchen, the best setup is the one that reduces clutter, waste, and decision fatigue.
- The cheapest setup is not the one with the lowest sticker price; it is the one that stays useful for months.
What do I need to start a low histamine kitchen?
You need a cutting board, a knife, one saucepan, one sheet pan, and a few storage containers.
Drafted with AI; not yet reviewed by a person.