Last updated: November 19, 2026
A messy fridge makes low histamine meal prep slow because the foods you need get buried, forgotten, and moved around too much. Quick answer: use 4 zones—one ready-to-eat shelf, one prep shelf, one produce drawer split into sections, and one label system. A good refrigerator organization system puts ready-to-eat food at eye level, ingredients in clear bins, and fast-cook items together. The steps below settle where each item goes, what to label, and how to build a fridge layout that saves time on a weeknight.
Build the fridge around one fast path
A low histamine fridge works best when the shortest route from door to plate is also the cleanest route. Picture this: you open the fridge, grab one bin, and start cooking without digging past random leftovers or half-used jars.
Start with shelf space you can actually reach in 10 seconds, then give every food group a fixed home. Keep the most ready-to-eat items front and center, and keep the “needs cooking” items together so you do not hunt for them later. That sounds simple, but it cuts down on pointless handling. Less handling means less confusion. Less confusion means faster meals.
-
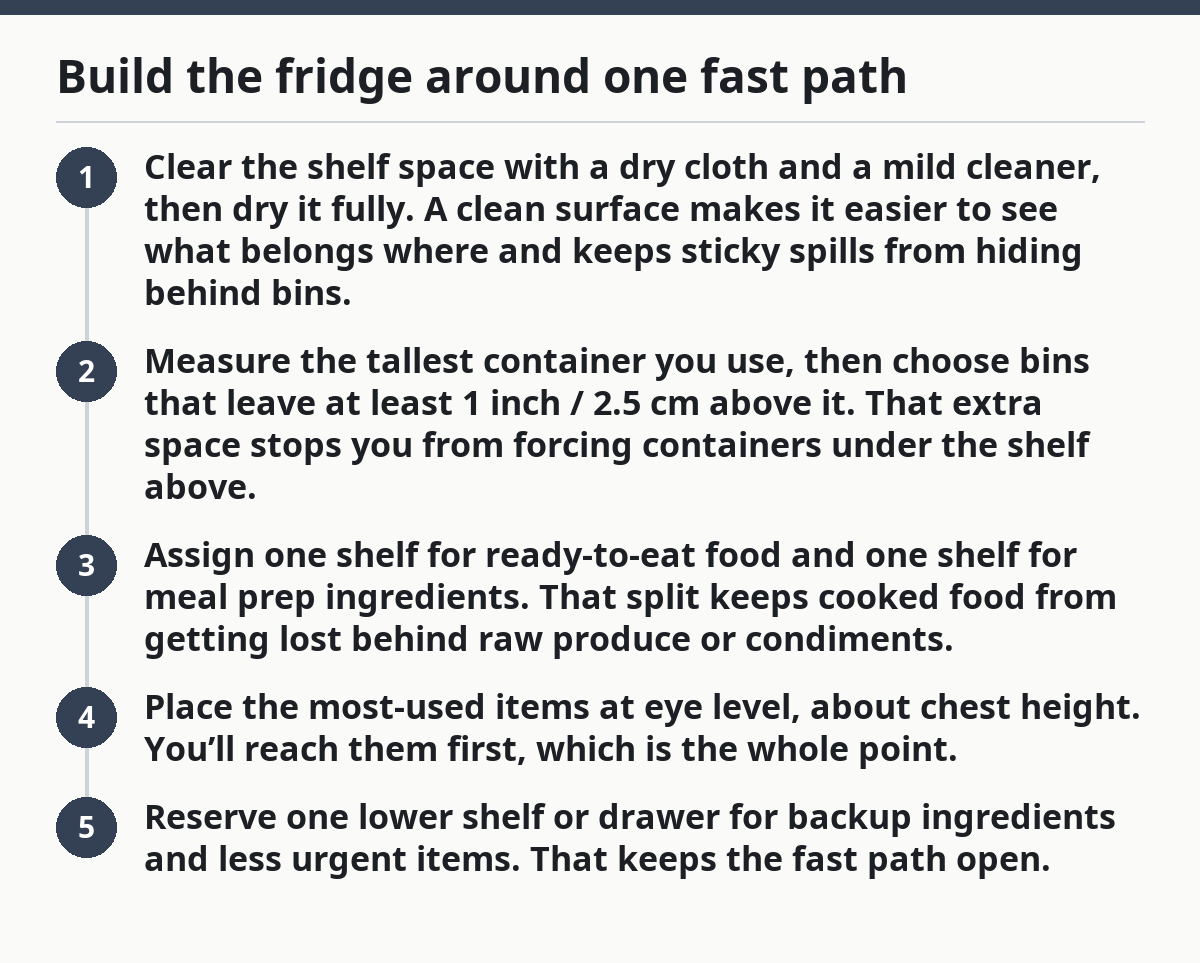
Clear the shelf space with a dry cloth and a mild cleaner, then dry it fully.
A clean surface makes it easier to see what belongs where and keeps sticky spills from hiding behind bins. -
Measure the tallest container you use, then choose bins that leave at least 1 inch / 2.5 cm above it.
That extra space stops you from forcing containers under the shelf above. -
Assign one shelf for ready-to-eat food and one shelf for meal prep ingredients.
That split keeps cooked food from getting lost behind raw produce or condiments. -
Place the most-used items at eye level, about chest height.
You’ll reach them first, which is the whole point. -
Reserve one lower shelf or drawer for backup ingredients and less urgent items.
That keeps the fast path open.
The truth is, a fridge layout only works if it stays boring. If you keep moving things because you “might need them somewhere else,” the system falls apart in 2 days.
Which foods should go in the ready-to-eat shelf?
The ready-to-eat shelf should hold the foods you can eat cold or reheat fast, because that is where meal prep becomes real time savings. Picture this: you come home at 6:30 p.m., open the door, and the next meal is already grouped in one place instead of scattered across three shelves.
Put cooked proteins, washed greens, chopped vegetables, and pre-portioned sauces in this zone if they fit your low histamine plan. Use clear containers so you can see what is inside without opening every box. Opaque bins look tidy for a day; clear containers save time every single meal.
This shelf should also be the first one you scan before cooking from scratch. If the food is visible, you are more likely to use it before it gets forgotten. If it is hidden, it becomes “mystery leftovers,” and mystery leftovers waste both food and time.
- Keep opened food in front.
- Put the oldest container on the left and the newest on the right.
- Use the same bin for the same meal type, such as lunch sides or dinner proteins.
- Leave at least 2 inches / 5 cm of open space at the front so labels stay readable.
Common allergens matter here. If your ready-to-eat shelf holds yogurt, use a separate container and label it clearly for dairy. If a recipe uses nuts, keep those in their own bin and use sunflower seeds or pumpkin seeds only if they fit your diet and you tolerate them. If eggs are part of your prep, give them one container so they do not roll into produce.
For a broader system, this page fits under the low histamine freezer and storage organization hub, which covers the larger storage plan without repeating the fridge layout details here.
How do I group ingredients so meal prep moves faster?
Group ingredients by meal use, not by grocery category, because cooking speed comes from grabbing one set at a time. Picture this: you want lunch assembled in 10 minutes, and every ingredient for that meal is already sitting in one bin instead of spread across vegetable drawers and door shelves.
Make one bin for proteins, one for chopped vegetables, and one for sauces or dressings that belong together. That makes “grab, cook, plate” much easier than sorting carrots from celery from herbs every night. A bin can hold a single recipe, too, if you cook in repeats. That works especially well when you prep the same 2 or 3 meals each week.
Use labels that name both the food and the date you stored it. A simple label like “Chicken, rice, carrots — Mon” is better than a vague “leftovers” sticker. You want first-in first-out to happen almost automatically.
-
Label each container with the food name and the prep date.
Clear labels make first-in first-out visible at a glance. -
Group similar ingredients in one refrigerator bin.
One bin for soup prep, one bin for salad prep, one bin for snack items. -
Stack only the containers you can remove without unbalancing the pile.
Tall stacks look neat but slow you down when the bottom box is the one you need. -
Move the oldest items to the front every time you add new food.
That one habit keeps older food from hiding behind fresh containers. -
Keep sauces and add-ons in a small bin near the meal they belong to.
You waste fewer steps when the dressing is beside the greens, not across the fridge.
Here’s the catch: if you group by ingredient type only, you may still have to pull from three places to finish one dish. Grouping by meal use saves more time.
Set up the vegetable drawers for the foods you use first
The vegetable drawers should hold the produce you cook most often, because drawer placement decides what gets used before it softens or disappears. Picture this: you open the drawer and see the vegetables for tonight’s dinner in front, not a pile of random produce under a loose bag.
Use one drawer for quick-cook vegetables and one for longer-lasting items if your fridge has two. If it has one drawer, split it with a bin or divider. The goal is simple: the most perishable items should be easiest to spot. Leafy greens in one section, sturdier vegetables in another.
Keep produce in dry, clean containers or bags that let you see what you have. A wet drawer turns produce into a cleanup job. If you wash vegetables before storing them, dry them well first. Moisture shortens visibility and makes the drawer messy faster. That is not a food-safety lecture — it is a speed problem. A damp drawer slows every meal.
- Put greens where you will see them first.
- Keep root vegetables or firmer produce behind them.
- Do not bury one vegetable under another.
- Check the drawer once a day when you open the fridge for dinner.
If you buy produce that needs washing, drying, and chopping, do that as soon as you get home when possible. A 15-minute prep block can save you from a 30-minute scramble later. If citrus, cucumbers, or herbs fit your meal plan, keep them in a small clear container so they do not vanish under bigger items.
Use labels and dates so first-in first-out happens on its own
Labels and dates keep a low histamine fridge usable because they stop good food from turning into guesswork. Picture this: you open the shelf and know exactly what needs to be used first without lifting three lids or sniffing every container.
Write the food name, the date, and, if helpful, the meal it belongs to. Use a label that sticks to plastic, glass, or stainless steel, not a note that falls off when the shelf gets damp. If you use reusable containers, a washable marker works well. If you prefer removable labels, place them on the lid front where you can see them fast.
The point is not decoration. The point is decision speed. A clear label cuts down on opening containers just to check what is inside. That matters more when you keep several similar dishes, such as soups or chopped vegetables, in the same shelf zone.
- Mark the oldest items first.
- Put fresh containers behind older ones.
- Use one label style across the fridge.
- Re-label leftovers when you move them to a new container.
First-in first-out is not fancy, and that is why it works. It is a plain rule: older food goes in front, newer food goes behind. Once you stop breaking that rule, the fridge starts helping you instead of fighting you.
What fridge layout mistakes slow meal prep the most?
A crowded shelf is one of the biggest fridge mistakes, because it turns every meal into a search job. Picture this: you are tired, the door is open, and the ingredient you need is somewhere behind a jar you forgot you bought.
The next mistake is using containers that are too tall or too deep for the shelf. A bin that barely fits gets shoved sideways, and then no one wants to move it. A better fit is a shorter clear container that leaves room to lift the lid and remove food with one hand. Deep containers also hide food at the bottom, which is how leftovers get missed.
Another problem is overfilling the vegetable drawers. A packed drawer crushes greens and makes it harder to see what needs using. The same goes for the fridge door. The door is useful for condiments and sealed items, but not for the foods you need to grab first. Opening and closing the door also moves the warmest shelf around more than people expect, so keep your most used meal prep food on stable shelves instead of in the door.
The easy fix is to keep the system spare, not full. Leave some blank shelf space. Leave some empty room in each bin. That empty space is not waste; it is what makes the layout fast.
How do I keep the fridge fast without making it look messy?
You keep it fast by choosing visibility over perfect symmetry. Picture this: the fridge looks calm, but every item still has a place you can reach without moving a stack of containers.
Use just enough bins to separate jobs. If everything gets its own container, the system becomes fussy and hard to maintain. A few clear containers do more work than a dozen tiny boxes. That matters if you prep for 2 people, or if you cook every 3 or 4 days and need the layout to change often.
Instead of overcomplicating the setup, use one ready-to-eat shelf, one prep shelf, one produce drawer split into sections, and one label system that never changes. If you want a cleaner look, use matching bins, but do not choose style over reach. The layout should let you cook in under 10 minutes of fridge time, not make the fridge look like a photo shoot.
For quick cooking, a fridge is doing its job when you can answer three questions at a glance: What is ready now? What needs to be used first? What is already grouped for tonight’s meal? If the answer takes more than a few seconds, the setup still needs work.
Key Takeaways
- Put ready-to-eat food at eye level so it gets used first.
- Group ingredients by meal, not just by type.
- Keep vegetable drawers easy to scan, not packed full.
- Label containers with food names and prep dates.
- Leave open shelf space so bins stay easy to lift and replace.
- Choose clear containers because visibility saves time every day.
Where should low histamine foods go in the fridge?
Low histamine foods should go in the part of the fridge you reach most often, with ready-to-eat food at eye level and prep ingredients grouped nearby. Put the oldest items in front so they get used first. Keep produce in drawers you can scan quickly, not in a hidden back corner.
How do i keep meal prep ingredients visible?
Use clear containers, short bins, and labels with the food name and date. Put the containers you need most often at the front of each shelf. Keep one bin for each meal or cooking task so you do not have to open every box to find one ingredient.
What is the best fridge setup for quick cooking?
A practical fridge setup for quick cooking separates ready-to-eat food, prep ingredients, and produce into clear zones. A shelf for cooked food, a shelf for active prep, and organized vegetable drawers make dinner faster. The setup should let you see the next meal in seconds, not minutes.
Low histamine freezer and storage organization hub can help you extend the same system beyond the fridge.
For food safety basics on chilled storage, see the FoodSafety.gov guide to fruits and vegetables and the FoodSafety.gov guide to meat, poultry, and seafood.
For home refrigeration temperature guidance, the FDA recommends keeping the refrigerator at 40°F / 4°C or below.
Drafted with AI; not yet reviewed by a person.