Last updated: November 19, 2026
Key Takeaways
- A histamine-friendly building block is a single ingredient or prep choice that may help; consult a professional if symptoms are severe or unclear. NHS
- Fresh proteins, plain starches, and non-acidic vegetables are common starting points, but tolerance varies by person.
- I build the meal by stacking a protein, a starch, two vegetables, and one simple finish, then stopping before the sauce stage.
- The easiest vegetables and starches are the ones that stay plain under heat and do not depend on fermentation, brining, or acidity for flavor.
Histamine-Friendly Recipe Building Blocks — The Complete Guide is a practical way to start cooking when aged, fermented, leftover, or slow-cooked foods are a problem. The core answer is simple: build meals from fresh protein, low-risk vegetables, plain starches, and a few safe fats, then season them without hiding histamine-heavy ingredients in sauces, broths, or marinades.
A useful way to think about this topic is not “Which recipe is safe?” but “Which ingredients can I combine again and again without triggering the usual problem foods?” For broader context, the U.S. Food and Drug Administration’s food storage guidance and the British Dietetic Association’s low-histamine resources are useful starting points. FDA BDA
What counts as a histamine-friendly building block?
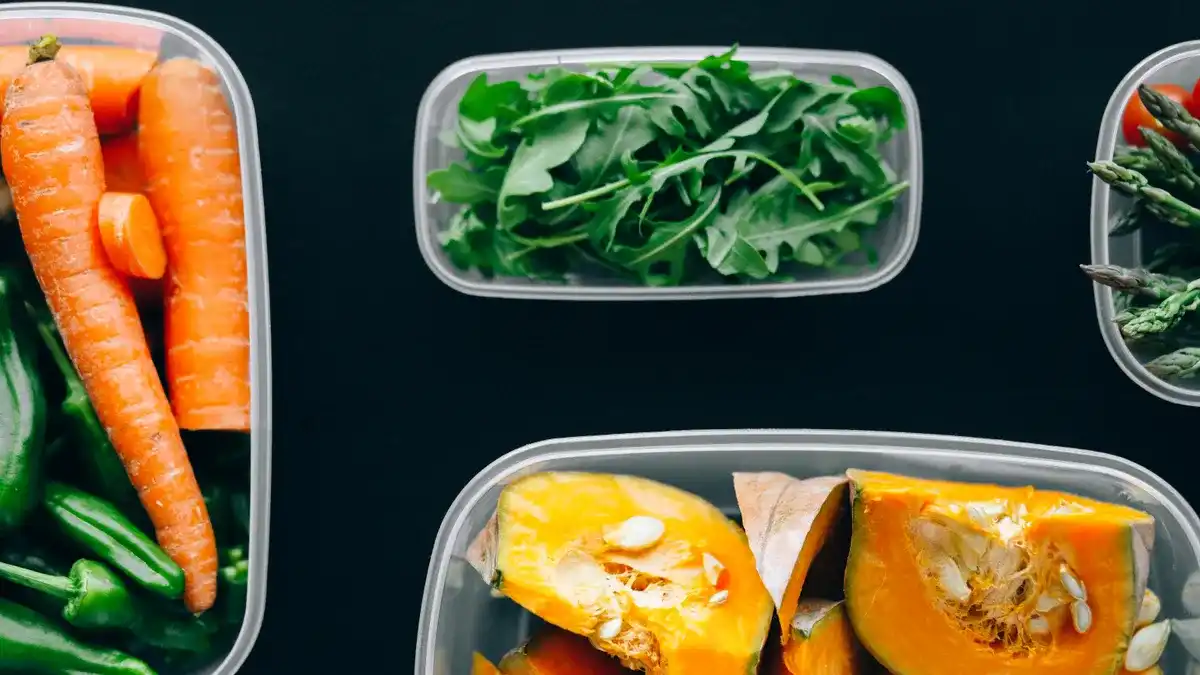
A histamine-friendly building block is a single ingredient or prep choice that may help anchor many meals without relying on aged, fermented, cured, or long-held foods; if symptoms are severe or unpredictable, consult a clinician or registered dietitian. Freshness matters as much as the ingredient itself: a plain chicken breast cooked today is not the same thing as chicken simmered all afternoon and stored for three days.
The core idea is visible on the plate. The safe version looks plain, short-ingredient, and fresh-cooked. The riskier version usually has a brown crust of age around it: stock cubes, vinegar-based dressings, soy sauce, parmesan, smoked meats, tomato-heavy sauces, or leftovers that have sat in the fridge for 48 hours.
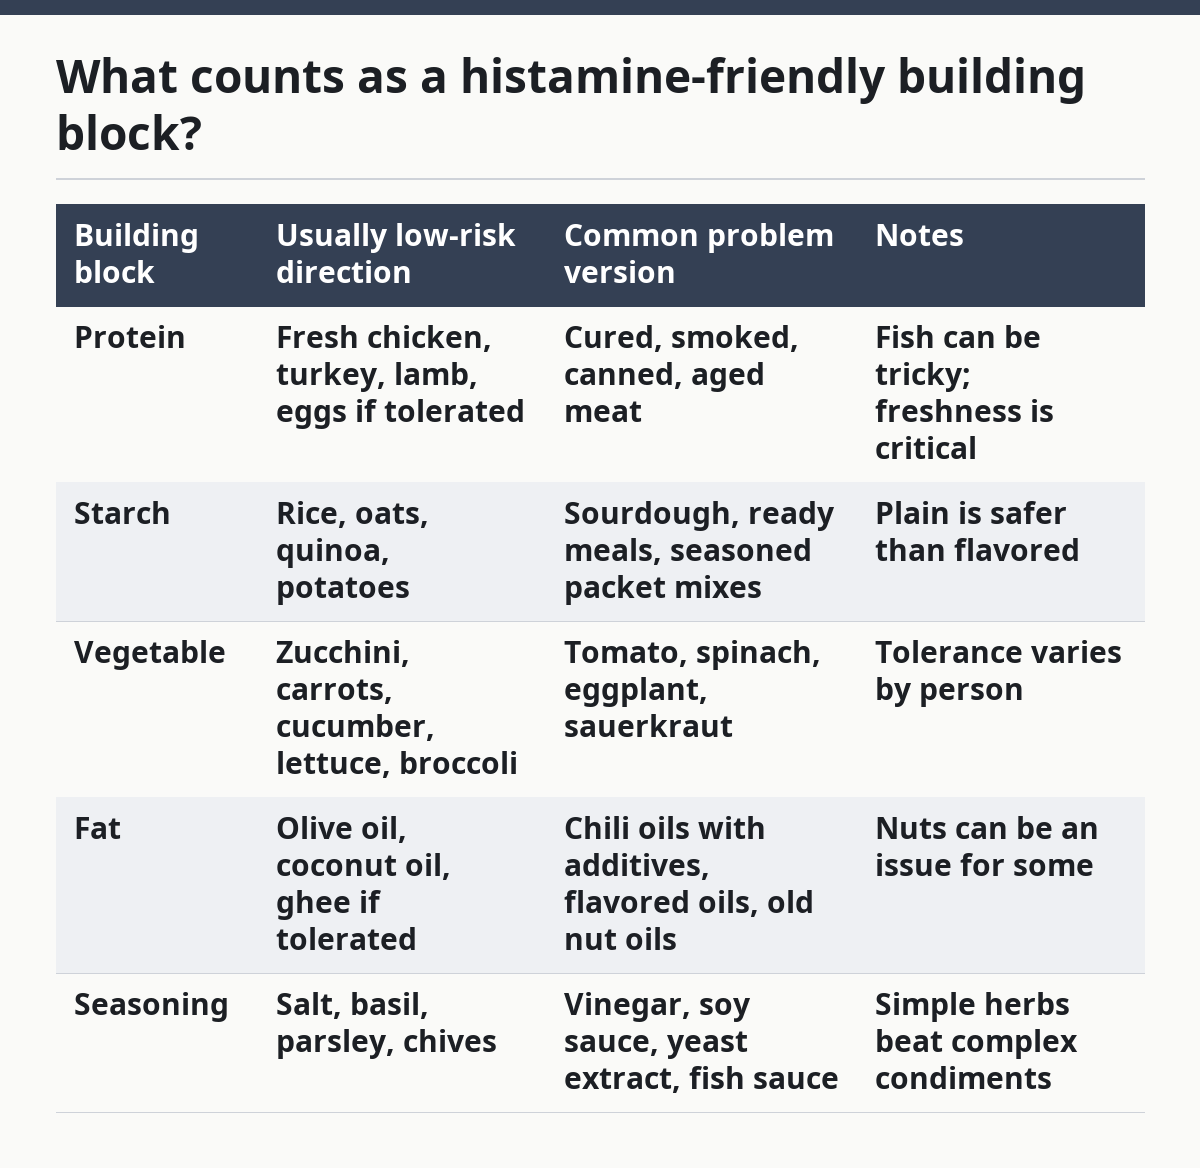
Here is the basic building-block map.
| Building block | Usually low-risk direction | Common problem version | Notes |
|---|---|---|---|
| Protein | Fresh chicken, turkey, lamb, eggs if tolerated | Cured, smoked, canned, aged meat | Fish can be tricky; freshness is critical |
| Starch | Rice, oats, quinoa, potatoes | Sourdough, ready meals, seasoned packet mixes | Plain is safer than flavored |
| Vegetable | Zucchini, carrots, cucumber, lettuce, broccoli | Tomato, spinach, eggplant, sauerkraut | Tolerance varies by person |
| Fat | Olive oil, coconut oil, ghee if tolerated | Chili oils with additives, flavored oils, old nut oils | Nuts can be an issue for some |
| Seasoning | Salt, basil, parsley, chives | Vinegar, soy sauce, yeast extract, fish sauce | Simple herbs beat complex condiments |
The first thing many beginners get wrong is treating “histamine-friendly” like one rigid diet list. It is not. Some people react to the same food that others handle fine, and the size of the serving matters too. A small portion of eggs may be fine for one person and not for another. If symptoms are severe or unpredictable, a clinician or registered dietitian should guide the plan.
Which ingredients are the safest starting points?
The safest starting points are fresh proteins, bland starches, and non-acidic vegetables used in short ingredient lists, although the safest choice depends on the individual. That is the cleanest way to reduce risk while still making food that tastes like a meal instead of a medical form.
I would start with ingredients that are easy to identify by sight and smell. The chicken should look like chicken, not carry a brined, smoked, or seasoned coating. The rice should be plain. The vegetables should be crisp, not pickled. The fat should be one oil, not a blend with flavorings.
A practical starter list
- Choose one fresh protein. Pick chicken breast, turkey mince, lamb, eggs, or a tolerated fish. Check: the ingredient list should be one item, or as close to one as possible. Do not: buy cured bacon, deli meat, marinated skewers, or anything with “smoke flavor.”
- Add one starch. Use white rice, oats, quinoa, potatoes, or sweet potato. Check: the package should not contain flavor sachets or seasonings. Do not: rely on instant flavored rice mixes.
- Pick two vegetables. Start with zucchini, carrots, green beans, cucumber, or lettuce. Check: choose vegetables that can be cooked or served raw without vinegar. Do not: assume every “green” vegetable is equal; spinach is a common problem food for many people.
- Choose one fat. Use olive oil, coconut oil, or ghee if dairy is tolerated. Check: it should smell clean and neutral. Do not: use flavored oils that hide garlic, chili, or extracts.
- Add simple herbs. Use basil, parsley, dill, or chives. Check: fresh or dried herbs should be single-ingredient. Do not: use seasoning blends that include yeast extract or “natural flavors.”
- Season only at the end. Salt first, herbs second, acid only if already known to be tolerated. Check: the final dish should still be readable as the base ingredients. Do not: drown it in sauces to make it taste “complete.”
The visible difference between a good starter plate and a bad one is control. A good one has 4 to 6 ingredients you can name instantly. A bad one hides three risk factors in a single sauce.
A useful rule: if an ingredient has already been aged, fermented, smoked, cured, pickled, or held hot for a long time before it reaches the pan, it is usually not a true building block.
How do I build a meal without relying on sauces?
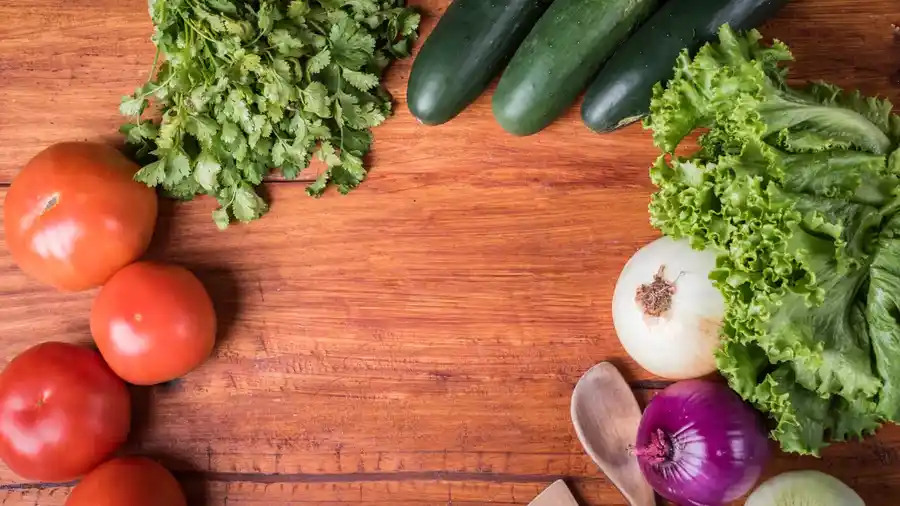
I build the meal by stacking a protein, a starch, two vegetables, and one simple finish, then stopping before the sauce stage. That keeps the flavor recognizable and avoids the usual traps: vinegar, soy sauce, stock cubes, tomato paste, and long-simmered reductions.
The safest-looking plate often looks plain at first glance, but the detail that matters is structure. The protein sits in one section, the starch in another, and the vegetables keep their color and shape. A sauce-heavy dish blurs everything together, which is exactly where the risky ingredients hide.
The base formula
Use this ratio as a starting point:
| Component | Typical portion | Visual cue | Common mistake |
|---|---|---|---|
| Protein | 100–150 g / 3.5–5.3 oz cooked | Palm-sized piece or small mound | Overcooking until dry, then masking with sauce |
| Starch | 150–200 g / 5.3–7 oz cooked rice or potato | Half the plate if needed for energy | Using flavored packet starches |
| Vegetables | 100–150 g / 3.5–5.3 oz total | Two separate colors | Relying on one problematic vegetable |
| Fat | 1–2 tbsp / 15–30 ml oil or ghee | Light sheen, not a pool | Heavy dressings and complex emulsions |
Step-by-step meal assembly
- Cook the protein fresh. Use 160°C / 320°F for baked chicken or a medium skillet for turkey patties. Check: the meat should be fully cooked but still juicy. Do not: cook a large batch and keep it as the week’s main protein if leftovers are a trigger.
- Cook the starch simply. Boil rice in plain water or roast potatoes with salt and oil. Check: the starch should taste neutral before seasoning. Do not: add bouillon, vinegar, or seasoning packets.
- Prepare vegetables with short heat. Steam zucchini for 3–5 minutes, sauté carrots for 6–8 minutes, or serve cucumber raw. Check: color should stay bright and the texture should not collapse. Do not: overcook until vegetables smell sweet and stale.
- Finish with one fat and one herb. Drizzle 1 tsp to 1 tbsp / 5–15 ml olive oil and scatter parsley. Check: the dish should smell clean, not sharp. Do not: finish with fermented condiments.
- Taste before adding acid. Salt may be enough. Check: ask whether the dish already has enough flavor from browning and herbs. Do not: force brightness with lemon, vinegar, or pickled toppings if those are common triggers.
- Plate with separation. Keep ingredients distinct instead of mixing into one mash. Check: you should still see each component. Do not: blend the meal into a casserole unless you know every ingredient is tolerated.
The plate should look clean and structured, not wet and brown. That visual difference matters because sauces and casseroles are where hidden ingredients gather.
Which vegetables and starches are easiest to work with?
The easiest vegetables and starches are the ones that stay plain under heat and do not depend on fermentation, brining, or acidity for flavor. Potatoes, rice, zucchini, carrots, cucumber, and lettuce are common starting points because they can stand on their own.
The visual clue is simple: the safe vegetable still looks like a vegetable after cooking. It has color, shape, and a short ingredient path from market to pan. The risky one often arrives as a jar, a pouch, or a side dish with a long label.
Best-fit choices and why they work
| Ingredient | How to use it | What correct looks like | What to avoid |
|---|---|---|---|
| White rice | Boiled in plain water | Separate grains, no seasoning packet | Flavored rice mixes, boxed pilaf |
| Potatoes | Roasted, boiled, mashed with oil | Soft inside, lightly salted outside | Instant mash with additives |
| Quinoa | Rinsed, then simmered 15 minutes / about 15 min | Fluffy, not bitter | Seasoned grain pouches |
| Zucchini | Quick sauté or steam | Still green, not watery | Long braising in tomato sauce |
| Carrots | Roasted or steamed | Soft but intact, sweet smell only | Glazed carrots with vinegar or citrus |
| Cucumber | Raw in salads or as a side | Crisp, cool, fresh-cut smell | Pickled cucumber, relish |
A beginner mistake is assuming a vegetable is “safe” because it is healthy in general. Spinach, tomato, eggplant, and avocado are common examples that can be tolerated by some people and not by others. That does not make them forbidden for everyone; it makes them poor starting blocks when symptoms are still unstable.
The same logic applies to starches. Bread can be fine for some people, but sourdough, yeasted breads, and long-fermented doughs complicate the picture. If the goal is a dependable recipe foundation, plain rice and potatoes usually win because they are simple and easy to portion at 150–200 g / 5.3–7 oz cooked.
What seasonings are safe enough to build flavor?
The safest seasonings are salt, fresh or dried herbs, and a few single-ingredient spices that you already know you tolerate. That means flavor can still be good, but it has to come from a shorter list and from the food’s own browning, not from bottled complexity.
The mistake I see most often is trying to replace every lost flavor with a substitute sauce. That usually backfires because the substitute is where vinegar, yeast extract, fermented soy, garlic-heavy blends, and citric acid hide. If one of those is a trigger, the “safer” bottle becomes the problem.
Flavor ladder from safest to riskier
-
Salt and olive oil
This is the cleanest base. Use 1/4 tsp / 1.5 g salt per serving as a loose starting point, then adjust. Check that the dish tastes rounded, not flat. Do not oversalt just to imitate processed food. -
Herbs
Basil, parsley, dill, coriander leaf, thyme, and chives are common starting herbs. Use 1 tsp dried or 1 tbsp fresh per serving. Check that herbs smell bright, not dusty. Do not use mixed seasoning blends without reading the full label. -
Single spices
Turmeric, cumin, ginger, and mild paprika may be tolerated by some people. Start with 1/8 to 1/4 tsp per serving. Check one new spice at a time. Do not stack several new spices in the same dish. -
Gentle aromatics
Some people tolerate cooked onion or garlic; others do not. Use small amounts, cook them until soft, and test separately. Check for symptoms later the same day and the next day if you are tracking reactions. Do not treat them as universally safe. -
Acid and fermented condiments
Lemon, vinegar, tamari, soy sauce, miso, fish sauce, and hot sauces are where many recipes tip over. If you use them at all, treat them as trial ingredients, not defaults. Check the label for fermentation or long aging. Do not add them automatically because “the recipe feels incomplete.”
The correct finished dish tastes balanced from salt, fat, herbs, and the ingredient’s own flavor. The incorrect one tastes sharp, salty, and masked. If a recipe only becomes enjoyable after a splash of vinegar or a spoonful of soy, it is probably not built on the right blocks for a histamine-sensitive kitchen.
How should I handle leftovers, freezing, and meal prep?
I handle leftovers by reducing the time food spends cooling, dividing it fast, and freezing extra portions instead of letting them sit in the fridge for days. This matters because histamine can rise in foods as they age, especially in protein-rich dishes.
This is one place where the generic advice is too vague. “Just meal prep” is often poor guidance for histamine-sensitive cooking. A four-day fridge plan is convenient, but convenience is not the same as tolerance. The FDA’s food storage guidance is useful here because time and temperature matter before the food ever reaches a plate. FDA
Safe storage rules that actually help
| Action | Target | Why it matters | Common mistake |
|---|---|---|---|
| Cool cooked food | Within 2 hours / about 120 minutes | Limits time in the temperature danger zone | Leaving a pot on the counter all evening |
| Portion leftovers | Small, shallow containers | Food cools faster and more evenly | Putting a whole batch into one deep bowl |
| Refrigerate | At 4°C / 40°F or below | Slows spoilage | Storing food in a warm, crowded fridge door |
| Freeze extra portions | Same day if possible | Better than keeping food for multiple days | “Saving it for later” in the fridge |
Step-by-step leftover workflow
- Cook only what you need. Make one meal plus one extra portion if your tolerance is uncertain. Check: the batch should be small enough to cool quickly. Do not: cook a huge pot of protein stew and hope it behaves.
- Move food into shallow containers. Spread it out so steam escapes. Check: the layer should be no more than a few centimeters / about 1 inch deep. Do not: seal piping-hot food in a deep plastic tub.
- Cool promptly. Get it into the fridge within 2 hours / about 120 minutes. Check: the container should no longer be hot enough to warm the fridge. Do not: leave it out overnight.
- Freeze what you will not eat soon. Label it if needed. Check: the food is frozen while still fresh. Do not: wait until day three or four.
- Reheat once. Bring the portion steaming hot before eating. Check: the center should be hot all the way through. Do not: reheat the same serving multiple times.
- Observe your pattern. Track which foods are easier fresh than reheated. Check: note symptoms within your usual reaction window. Do not: assume every reaction comes from the same ingredient.
This is not a perfect system, and it is not for anyone who needs ultra-convenient batch cooking every Sunday. If the household depends on large mixed casseroles, long fridge life, or leftovers every day, this approach may feel annoying. It is still the more honest starting point for a sensitive eater.
What does a finished histamine-friendly plate look like?
A finished histamine-friendly plate looks simple, fresh-cooked, and easy to read at a glance. The ingredients stay distinct, the seasoning stays short, and the food looks like it was made recently rather than assembled from multiple preserved parts.
The visual difference matters. A good plate usually has one browned protein, one plain starch, and two vegetables with obvious color. A bad plate tends to be sauced, brown all over, or built from jars and packets. If the whole dish has one uniform color and one strong smell, that is often a sign that too many risk ingredients have been mixed together.
Example plate patterns
| Plate type | Example build | What it should look like | Why it works |
|---|---|---|---|
| Simple dinner | Chicken, rice, zucchini, olive oil, parsley | Separate pieces, light gloss, no pooling sauce | Few ingredients, low complexity |
| Breakfast | Oats with pear and cinnamon | Thick oats, visible fruit pieces | No fermentation or aged dairy needed |
| Lunch bowl | Turkey patties, potatoes, carrots, chives | Clean edges, little moisture | Easy to portion and reheat cautiously |
| Vegetarian option | Quinoa, cucumber, lettuce, roasted carrots, tolerated oil | Fresh color, crisp texture | Works when legumes are not tolerated |
Step-by-step “good plate” check
- Look for one anchor protein or starch. Check: the meal should not depend on a sauce for identity. Do not: build around a marinade.
- Check the ingredient count. Check: 4 to 6 ingredients is a practical target. Do not: use a long pantry list just because each item is “technically” safe.
- Check color separation. Check: vegetables should still look like themselves. Do not: cook everything into a brown mash.
- Check the smell. Check: it should smell clean, warm, and direct. Do not: rely on sour, sharp, or fermented aromas.
- Check the storage plan. Check: you know whether the food will be eaten now, refrigerated, or frozen. Do not: leave the plan vague if leftovers are a trigger.
- Check personal tolerance. Check: each new ingredient should be added in isolation when possible. Do not: test three unknowns on the same day.
This is the right place to say what the guide is not for. It is not for people looking for a one-size-fits-all elimination diet, and it is not a substitute for medical advice if reactions are severe, involve breathing issues, swelling, or hives. Those symptoms need professional evaluation.
For broader food safety guidance, the U.S. Food and Drug Administration’s page on food storage and time/temperature control is useful, and the British Dietetic Association has patient-facing material on low-histamine eating that can help put the food list in context.
What should I avoid when building from scratch?
I should avoid anything aged, fermented, cured, smoked, heavily processed, or left sitting too long, because those are the most common ways to push an otherwise decent meal into trouble. That includes obvious items like salami and sauerkraut, but also less obvious ones like stock cubes, yeast extract spreads, and sauces built from fermentation.
The problem is not always the visible ingredient. A dish can look fresh and still hide a high-risk base. A roast chicken tossed with a store-bought seasoning packet is not the same as a chicken cooked with salt and thyme.
Common traps and safer swaps
- Swap cured meat for fresh meat. Use fresh chicken, turkey, or lamb. Check: the package should not say cured, smoked, or seasoned. Do not: substitute bacon or deli slices.
- Swap vinegar dressings for oil and herbs. Use olive oil with parsley or dill. Check: the dressing should be a short ingredient list. Do not: assume “light” dressing is safer.
- Swap tomato sauce for a plain vegetable side. Roast carrots or zucchini instead. Check: the side dish should not need acidic sauce. Do not: use tomato paste as a hidden base.
- Swap broth cubes for water and salt. Build flavor with the pan, not the cube. Check: the ingredient list should stay short. Do not: depend on yeast extract or flavor enhancers.
- Swap fermented condiments for single herbs. Try basil or chives first. Check: each new flavor should be identifiable. Do not: use miso, soy sauce, fish sauce, or tamari as default seasoning.
The biggest trade-off is flavor depth. A histamine-friendly dish can taste less “complex” than a standard home-cooked meal, especially at first. That is the price of keeping the ingredient list short and the storage simple. For many people, that trade-off is worth it; for someone who thrives on heavily seasoned cooking, it may feel too restrictive.
Can I make this practical for a whole week?
Yes, I can make it practical by repeating a few reliable building blocks and varying the format instead of the core ingredients. The week works best when I cook fresh, freeze extra portions, and rotate 2 proteins, 2 starches, and 4 vegetables rather than trying seven new recipes.
A workable weekly pattern is usable, even if it is not glamorous. The plate changes shape, not chemistry. Chicken becomes patties one day and roasted pieces the next. Rice becomes a bowl on Monday and a side dish on Wednesday. Carrots appear steamed, then roasted, then shredded raw.
A simple rotation model
- Protein options: chicken breast, turkey mince, lamb
- Starch options: white rice, potatoes, quinoa
- Vegetable options: zucchini, carrots, cucumber, lettuce
- Flavor options: salt, olive oil, parsley, dill, basil
A 3-day starter rotation
- Day 1: roast-and-bowl. Roast chicken at 190°C / 375°F for about 20–25 minutes, depending on thickness. Check: the center is cooked through. Do not: over-marinate before baking.
- Day 2: skillet meal. Pan-cook turkey patties and serve with rice. Check: the surface is browned but not burnt. Do not: reheat patties multiple times.
- Day 3: lighter plate. Serve potato wedges, cucumber, and a fresh herb finish. Check: the meal still has protein if your needs require it. Do not: let a “light” day become an underfed day.
- Repeat one variable at a time. Change only the vegetable or the herb. Check: symptom tracking stays readable. Do not: change protein, starch, and seasoning all at once.
- Freeze the extra portions immediately. Check: there is a clear plan for each serving. Do not: stack three days of leftovers in one fridge box.
- Keep one emergency meal. Plain rice with a tolerated protein is better than guessing when hungry. Check: the backup meal uses known ingredients only. Do not: reach for a convenience food with a long label.
For many readers, this is the turning point: histamine-friendly cooking becomes easier when it is treated like a set of modular parts instead of a special diet menu. The main limitation is boredom. The cure for boredom is not more risk; it is better rotation, better texture, and cleaner seasoning.
What are the questions people still ask before they start?
A beginner usually asks the same few questions because the food list is only half the problem; the real issue is deciding what is safe enough to try first and what should wait. The answers below are the ones I would give before anyone fills a cart.
Can I eat eggs on a histamine-friendly plan?
Eggs are tolerated by some people and not by others, so they are a trial food rather than a universal yes. If you use them, start with a small portion like 1 egg and keep the rest of the meal plain. If eggs repeatedly trigger symptoms, move them out of the core rotation.
Are frozen vegetables acceptable?
Frozen vegetables can be acceptable if they are plain and have no sauces, seasonings, or added acids. The key is the ingredient panel: one vegetable, maybe water, and nothing else. Avoid mixed frozen dishes that include cheese, seasoning blends, or tomato-based sauce.
Is fresh fish okay?
Fresh fish may work for some people, but it is one of the most time-sensitive proteins and deserves caution.
Drafted with AI; not yet reviewed by a person.